Table of Contents
- Introduction
- Main Features
- How To Setup TR4 System
- All TechnoResearch Cables
- Troubleshooting
- Common Jobs
- Updating Centurion License
- Non-Stock ECUs
- Connecting via Bluetooth
- Victory / Indian Diagnostics
- Checking DTCs Manually (HD)
- FAIL message When Performing Blank ECU Programming
- 1. Centurion Setup and Installation
- 1.1 Where to get the Software
- 1.2 Install Centurion
- 1.3 Run Centurion
- 1.4 Insert Security Key into USB Port
- 1.5 Connect USB Cable
- 1.6 Powerup the Centurion
- 1.7 Powerup to Automatically Install Drivers
- 1.8 Update the Centurion Software
- 1.9 Centurion Disclaimer/Language Selection
- 1.10 Confirm COM Port for Communication
- 1.11 Troubleshooting COM Port Issues
- 2. Using the Centurion
- 3. Centurion Toolbar Icon Description
- 4. Centurion – How to Change Units/Colors
- 5. Centurion Super Pro/Audio – Monitor Real-Time Data (Digital Data View)
- 6. Centurion Super Pro/Audio – Monitor Real-Time Data (Strip Chart Display)
- 7. Centurion Super Pro – Harley Davidson Tests and Activations
- 8. Centurion – Specific Functions for Harley-Davidson® Motorcycles
- ECU/ECM
- 8.1 Centurion Super Pro/Audio – Read And Clear DTCS
- 8.2 Centurion Super Pro – Speedometer Calibration
- 8.6 Centurion Super Pro – Air Fuel Value (AFV)
- 8.7 Centurion Super Pro – Idle Adjustment
- 8.8 Centurion Super Pro – Blank ECU Programming
- 8.9 Centurion Super Pro – Blank Ecu Programming (Clone)
- 8.11 Centurion Super Pro – Module Replacement (4-Pin Models)
- 8.12 Centurion Super Pro – Module Replacement (6-Pin Models)
- 8.13 Centurion Super Pro – ECU: (Enable/Disable)
- 8.17 Centurion Super Pro – Fuel Tank Drain
- 8.18 Centurion Super Pro – Compression Test
- TSM-TSSM-HFSM-BCM
- 8.3 Centurion Super Pro – Hands Free Keyfob Programming
- 8.4 Centurion Super Pro – Keyfob Disabling (Hands Free Fob Only)
- 8.5 Centurion Super Pro – Program Personal Identification Number (Pin) / Personal Key Code
- 8.19 Centurion Super Pro – BCM: (Enable/Disable)
- 8.20 Centurion Super Pro – BCM-Lights: (Enable/Disable)
- 8.22 Centurion Super Pro – Unlocking A Security Module
- 8.23 Centurion Super Pro – Security: Push Button Fob Manual Programming
- INFOTAINMENT
- INSTRUMENTATION
- ABS
- TPMS
- ECU/ECM
- 9. Location of Diagnostic Connectors
- Centurion Glossary
8.12 Module Replacement (6-Pin Models)
Centurion Super Pro
Connect/marry new modules to the old modules. Pre-CAN models it was a 30 minute manual procedure, now those take 14 minute. CAN models REQUIRE it be done with a tool, such as CENTURION.
NOTE: If the ECU is locked by another product, you will NOT be able to perform any active settings changes as we will not be able to communicate with the ECU.
If you are performing one of the following replacements click the hyperlink below:
When do you need to do a Module Replacement?
| Replaced: | Module Replacement procedure required? | Additional steps (if required) |
|---|---|---|
| ECM | Yes | Speedometer Calibration, ACR on/off, EITMS on/off |
| TSM replaced with TSM | No | |
| TSM replaced with TSSM | Yes | Must program 5-digit PIN on blank TSSMs before doing Module Replacement. For Handsfree: KeyFob programming. |
| TSSM replaced with TSM | Yes | |
| TSSM replaced with TSSM | Yes | Must program 5-digit PIN on blank TSSMs before doing Module Replacement For Handsfree: KeyFob programming. |
| BCM | Yes | Must program 5-digit PIN on blank BCMs before doing Module Replacement. After marrying: BCM enable/disable settings & Keyfob programming. |
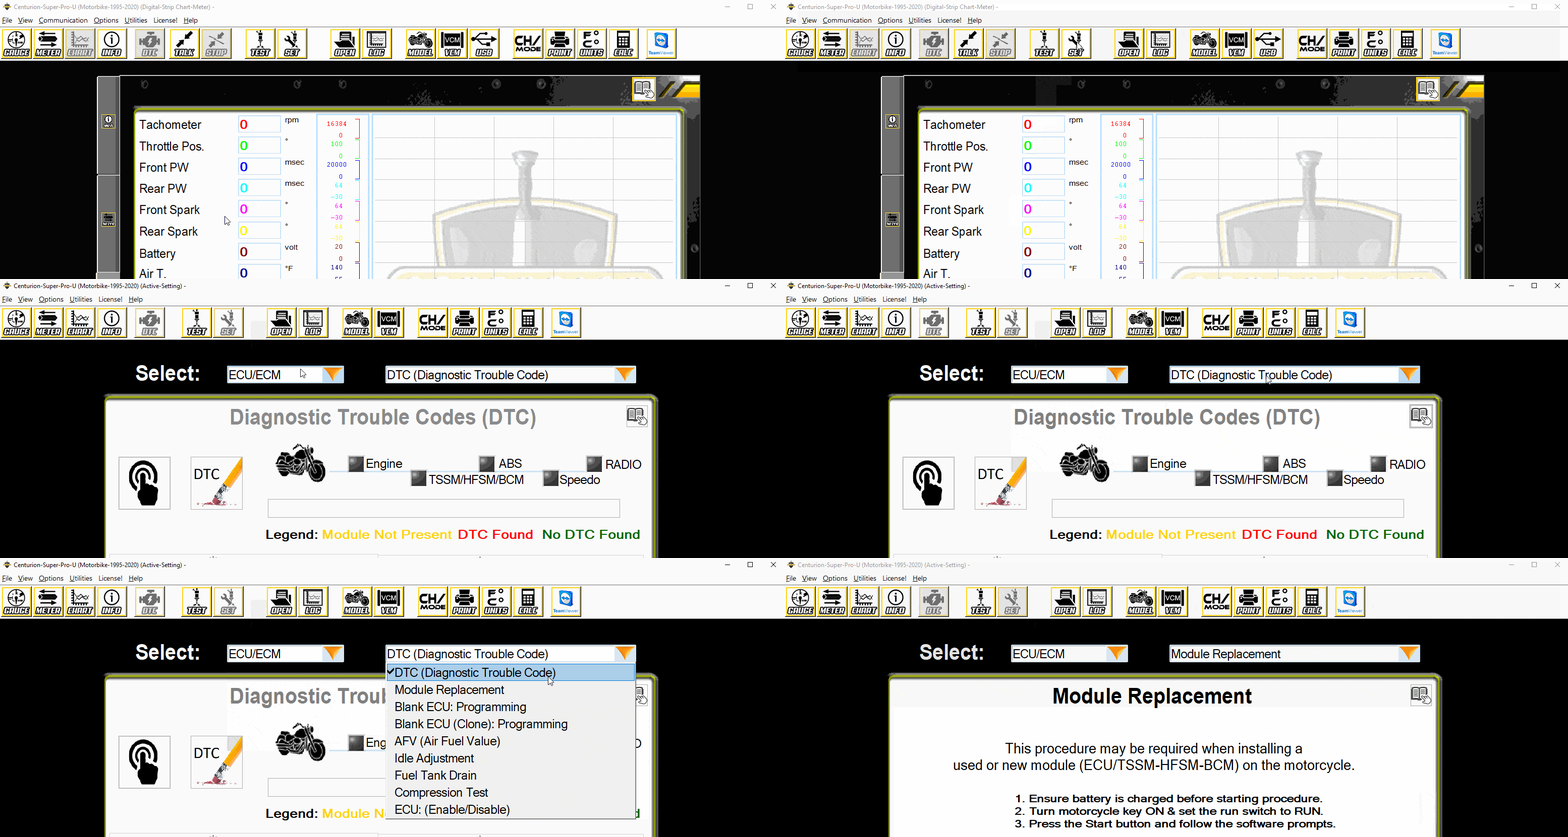
- Select the Active Settings Icon (
 )
) - In the first dropdown menu select 'ECU/ECM'
- In the second dropdown menu select 'Module Replacement'

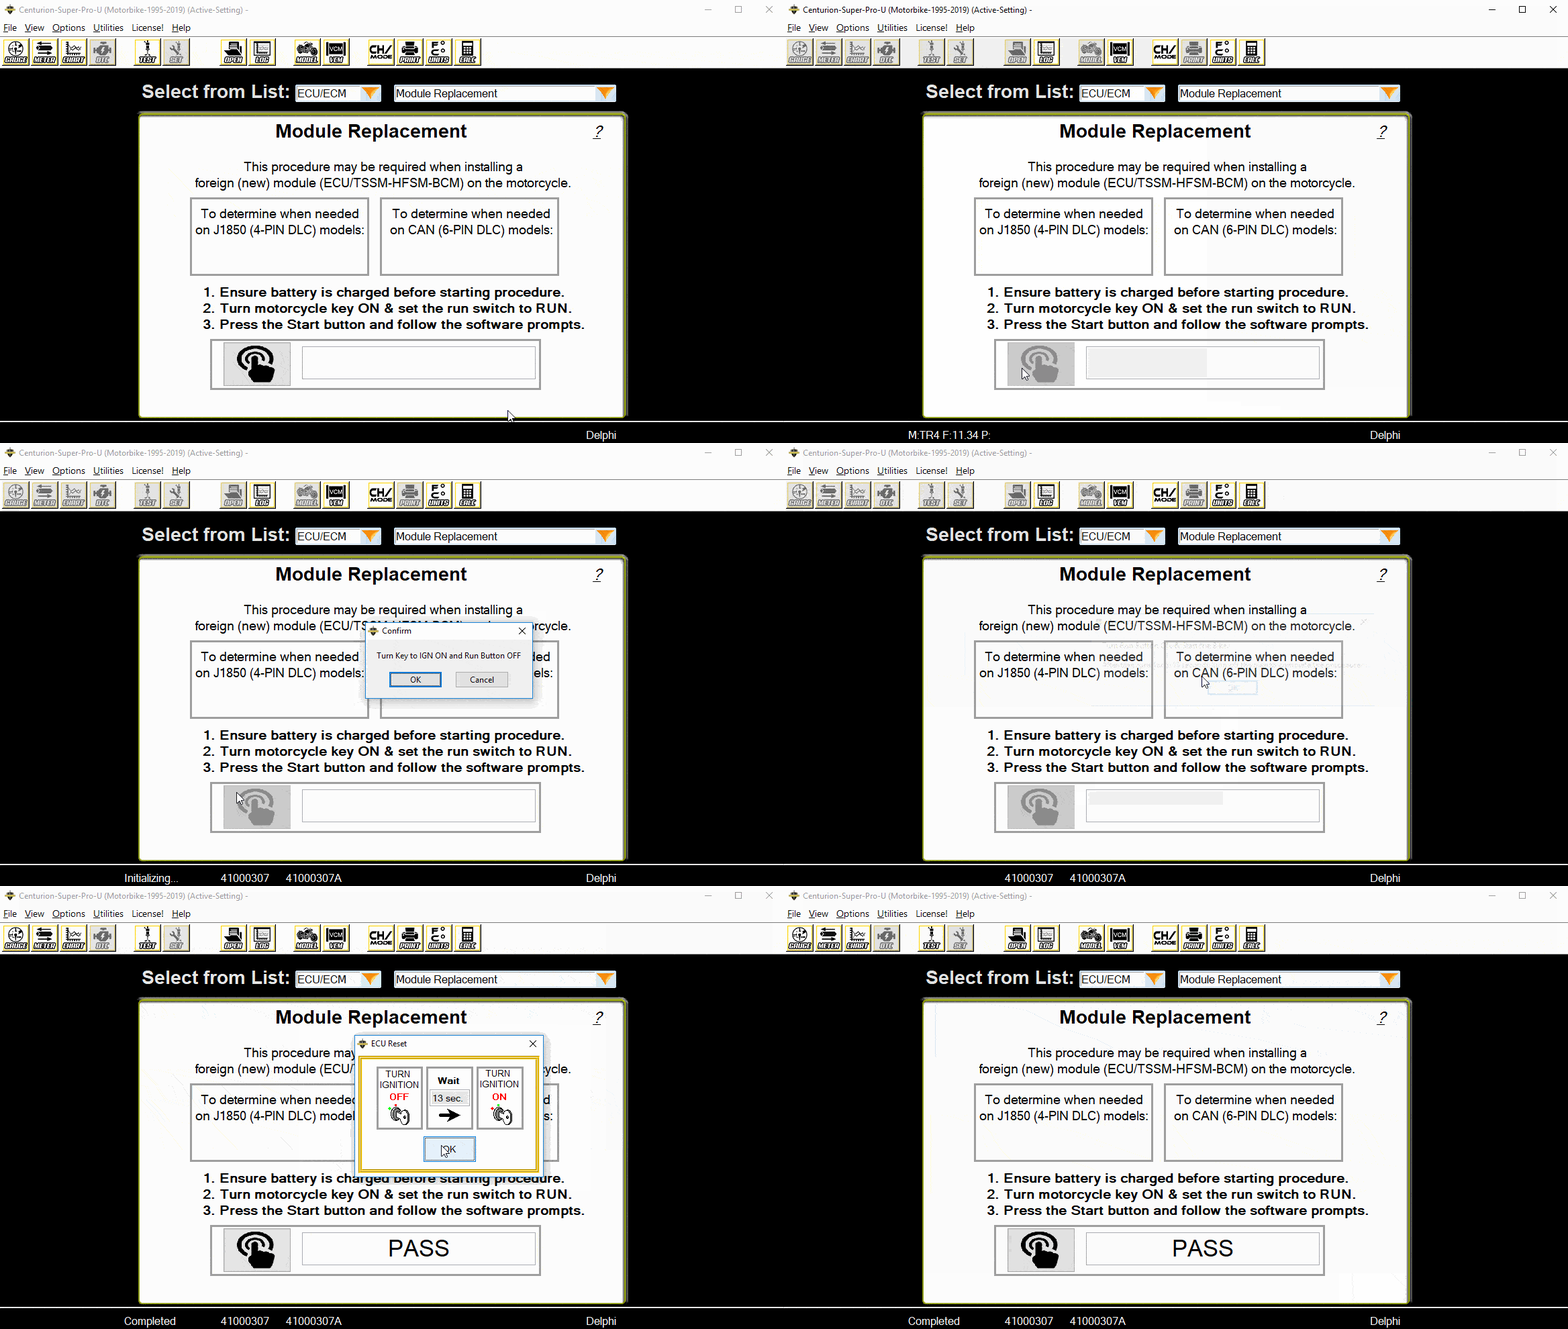
- Key to IGN & Run Button ON
-
Click on 'Begin' on the software

- Follow the prompts on the screen
- Models with a 4 pin diagnostics connector will require you to: Key IGN, RUN ON, START, STALL, then wait 12-15 minutes. Detailed more HERE.
- Models with a 6 pin diagnostics connector will not require the start/stall/wait sequence, but may vary between RUN off or RUN on requirements depending on the model
- NOTE: For CVO bikes only, you will leave RUN button on when prompted to turn off.
- Wait 10 seconds for 'PASS'
- DO NOT TURN KEY OFF
- Run button ON & start motorcycle.
