Table of Contents
- Introduction
- Main Features
- How To Setup TR4 System
- All TechnoResearch Cables
- Troubleshooting
- Common Jobs
- Updating Centurion License
- Non-Stock ECUs
- Connecting via Bluetooth
- Victory / Indian Diagnostics
- Checking DTCs Manually (HD)
- FAIL message When Performing Blank ECU Programming
- 1. Centurion Setup and Installation
- 1.1 Where to get the Software
- 1.2 Install Centurion
- 1.3 Run Centurion
- 1.4 Insert Security Key into USB Port
- 1.5 Connect USB Cable
- 1.6 Powerup the Centurion
- 1.7 Powerup to Automatically Install Drivers
- 1.8 Update the Centurion Software
- 1.9 Centurion Disclaimer/Language Selection
- 1.10 Confirm COM Port for Communication
- 1.11 Troubleshooting COM Port Issues
- 2. Using the Centurion
- 3. Centurion Toolbar Icon Description
- 4. Centurion – How to Change Units/Colors
- 5. Centurion Super Pro/Audio – Monitor Real-Time Data (Digital Data View)
- 6. Centurion Super Pro/Audio – Monitor Real-Time Data (Strip Chart Display)
- 7. Centurion Super Pro – Harley Davidson Tests and Activations
- 8. Centurion – Specific Functions for Harley-Davidson® Motorcycles
- ECU/ECM
- 8.1 Centurion Super Pro/Audio – Read And Clear DTCS
- 8.2 Centurion Super Pro – Speedometer Calibration
- 8.6 Centurion Super Pro – Air Fuel Value (AFV)
- 8.7 Centurion Super Pro – Idle Adjustment
- 8.8 Centurion Super Pro – Blank ECU Programming
- 8.9 Centurion Super Pro – Blank Ecu Programming (Clone)
- 8.11 Centurion Super Pro – Module Replacement (4-Pin Models)
- 8.12 Centurion Super Pro – Module Replacement (6-Pin Models)
- 8.13 Centurion Super Pro – ECU: (Enable/Disable)
- 8.17 Centurion Super Pro – Fuel Tank Drain
- 8.18 Centurion Super Pro – Compression Test
- TSM-TSSM-HFSM-BCM
- 8.3 Centurion Super Pro – Hands Free Keyfob Programming
- 8.4 Centurion Super Pro – Keyfob Disabling (Hands Free Fob Only)
- 8.5 Centurion Super Pro – Program Personal Identification Number (Pin) / Personal Key Code
- 8.19 Centurion Super Pro – BCM: (Enable/Disable)
- 8.20 Centurion Super Pro – BCM-Lights: (Enable/Disable)
- 8.22 Centurion Super Pro – Unlocking A Security Module
- 8.23 Centurion Super Pro – Security: Push Button Fob Manual Programming
- INFOTAINMENT
- INSTRUMENTATION
- ABS
- TPMS
- ECU/ECM
- 9. Location of Diagnostic Connectors
- Centurion Glossary
1.11 Centurion - Troubleshooting COM Port Issues
If the COM port cannot be selected and checking the USB box does not allow connection, it means that the driver for it was not correctly installed when installing the software.
- Go to the computers Control Panel, select 'Hardware and Sound', select 'Device Manager'.
- Expand 'Other Devices' or 'COM Ports' to locate the serial converter or key.
- If the COM port is not showing but the device is properly connected, the
 icon will appear:

IMPORTANT: This means that the driver was not correctly installed when installing software.
To get the correct driver, select 'Help' from the menu and 'Download Driver (USB)' from the dropdown list.


Go back to the 'Port Setting' window in the software and make sure the corresponding number is selected—the example above COM11 OR check the box for USB.
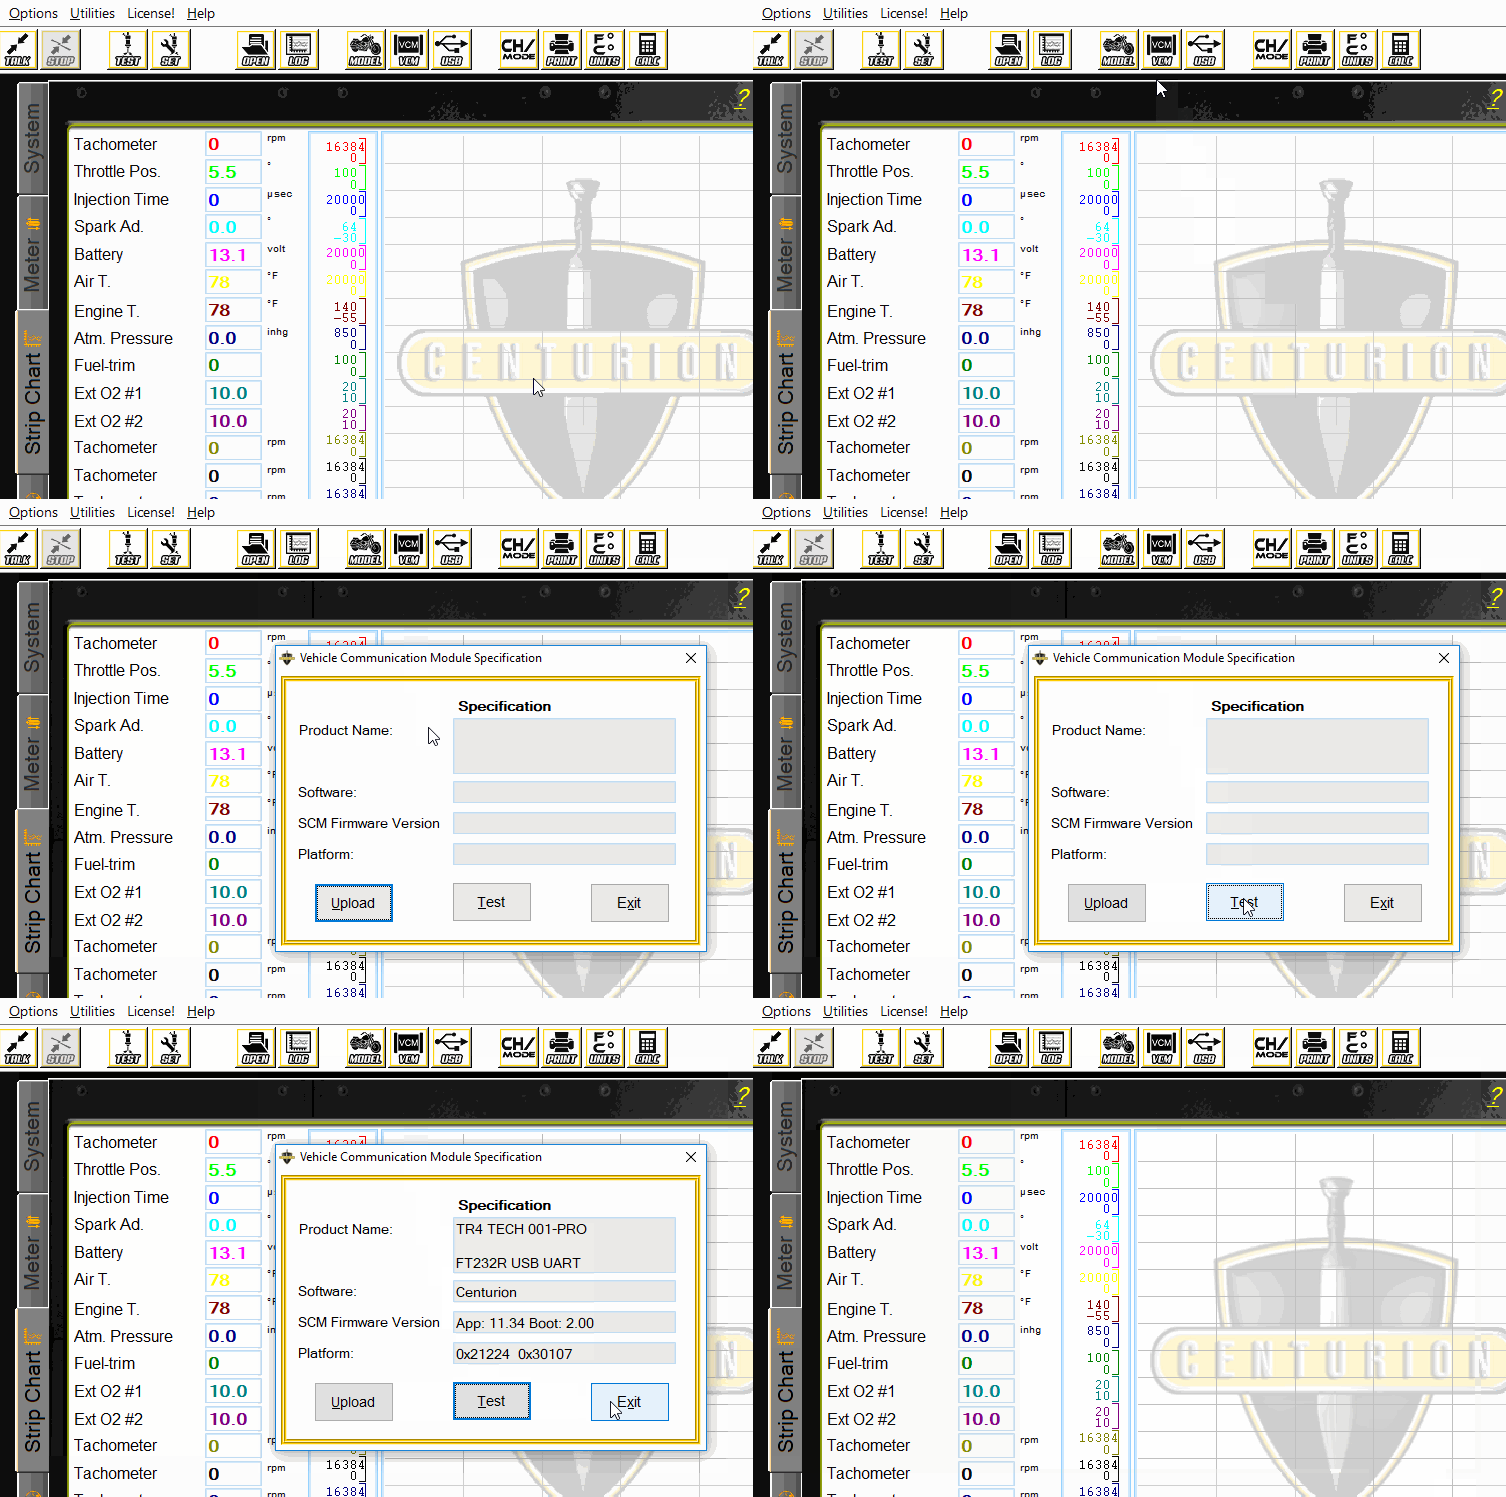
Test for connection by testing the VCM (see animation below).

