Table of Contents
- Introduction
- Main Features
- How To Setup TR4 System
- All TechnoResearch Cables
- Troubleshooting
- Common Jobs
- Updating Centurion License
- Non-Stock ECUs
- Connecting via Bluetooth
- Victory / Indian Diagnostics
- Checking DTCs Manually (HD)
- FAIL message When Performing Blank ECU Programming
- 1. Centurion Setup and Installation
- 1.1 Where to get the Software
- 1.2 Install Centurion
- 1.3 Run Centurion
- 1.4 Insert Security Key into USB Port
- 1.5 Connect USB Cable
- 1.6 Powerup the Centurion
- 1.7 Powerup to Automatically Install Drivers
- 1.8 Update the Centurion Software
- 1.9 Centurion Disclaimer/Language Selection
- 1.10 Confirm COM Port for Communication
- 1.11 Troubleshooting COM Port Issues
- 2. Using the Centurion
- 3. Centurion Toolbar Icon Description
- 4. Centurion – How to Change Units/Colors
- 5. Centurion Super Pro/Audio – Monitor Real-Time Data (Digital Data View)
- 6. Centurion Super Pro/Audio – Monitor Real-Time Data (Strip Chart Display)
- 7. Centurion Super Pro – Harley Davidson Tests and Activations
- 8. Centurion – Specific Functions for Harley-Davidson® Motorcycles
- ECU/ECM
- 8.1 Centurion Super Pro/Audio – Read And Clear DTCS
- 8.2 Centurion Super Pro – Speedometer Calibration
- 8.6 Centurion Super Pro – Air Fuel Value (AFV)
- 8.7 Centurion Super Pro – Idle Adjustment
- 8.8 Centurion Super Pro – Blank ECU Programming
- 8.9 Centurion Super Pro – Blank Ecu Programming (Clone)
- 8.11 Centurion Super Pro – Module Replacement (4-Pin Models)
- 8.12 Centurion Super Pro – Module Replacement (6-Pin Models)
- 8.13 Centurion Super Pro – ECU: (Enable/Disable)
- 8.17 Centurion Super Pro – Fuel Tank Drain
- 8.18 Centurion Super Pro – Compression Test
- TSM-TSSM-HFSM-BCM
- 8.3 Centurion Super Pro – Hands Free Keyfob Programming
- 8.4 Centurion Super Pro – Keyfob Disabling (Hands Free Fob Only)
- 8.5 Centurion Super Pro – Program Personal Identification Number (Pin) / Personal Key Code
- 8.19 Centurion Super Pro – BCM: (Enable/Disable)
- 8.20 Centurion Super Pro – BCM-Lights: (Enable/Disable)
- 8.22 Centurion Super Pro – Unlocking A Security Module
- 8.23 Centurion Super Pro – Security: Push Button Fob Manual Programming
- INFOTAINMENT
- INSTRUMENTATION
- ABS
- TPMS
- ECU/ECM
- 9. Location of Diagnostic Connectors
- Centurion Glossary
8.9 Blank Ecu Programming (Clone)
Centurion Super Pro
NOTE: If the ECU is locked by another product, you will NOT be able to perform any active settings changes as we will not be able to communicate with the ECU.
This feature clones the Old ECU (2005-2019) to the new Blank ECU. In order to complete this process, we must be able to communicate with the old ECU. The procedure will preserve the tuning file in the old ECU. If you do not have the old ECU then you will need to follow the instructions HERE to program the new ECU.
If you would like a complete in-depth walkthrough of this procedure click HERE.
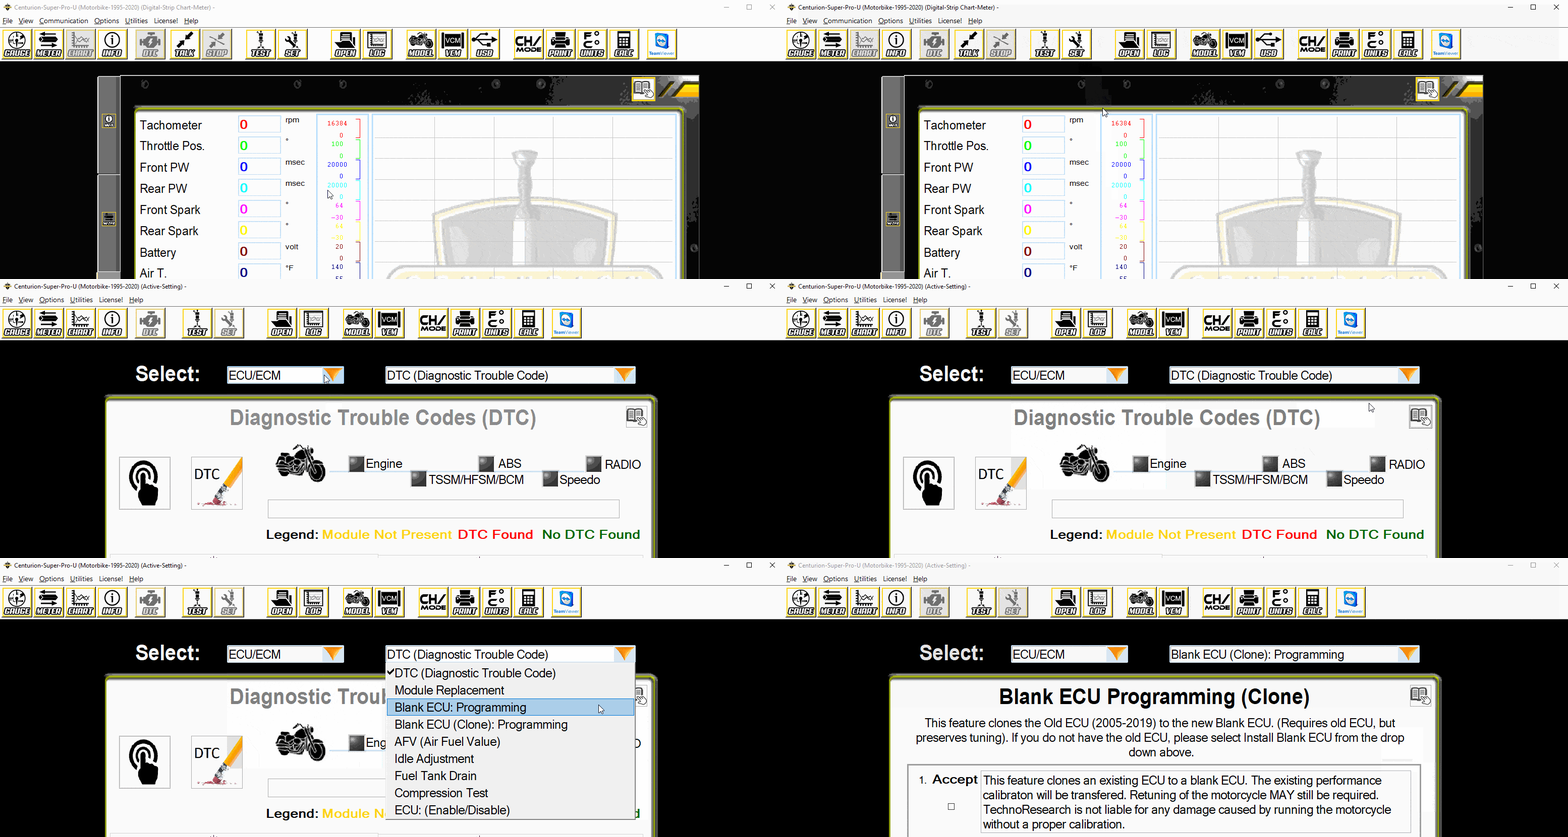
- Select the Active Settings Icon (
 )
) - In the first dropdown menu select 'ECU/ECM'
- In the second dropdown menu select 'Blank ECU (Clone): Programming'

- Start by keeping the OLD Engine Control Module (ECM) plugged in.
- Ensure that the IGN is ON, the RUN button is set to RUN , and the VCM is connected.
- Ensure that the battery is at 12v or more and will remain so for the duration of the test.
- Read and accept the disclaimer.
- OLD ECM needs to remain in the motorcycle. Click 'Read Old ECU'.
-
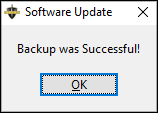
You will receive a pop-up window to save the old ECU mapping.
NOTE: This will automatically create a folder with the VIN as a place to save the file.

-
The software will then connect with the bike and begin transfer and save of the mapping in the ECU.

- When it completes you will receive a pop-up window notifying you that the backup was successful and a 'PASS' message in the text box on the right-hand side.

-
You will then install the 'NEW ECU' to the bike.
NOTE: When installing the new ECM, ensure that the bike is turned off so that there is no power getting to the ECM.
- Now you will click 'Program New ECU'
- You will receive another pop-up window asking for you to select the mapping file that was saved from the 'previous ECU'.
- After selecting the file that was saved, the programming of the 'new ECU' will begin.
- When the bike finishes programming you will receive another 'PASS' message on the right-hand side
- After successfully cloning the map to the 'new ECU', you will need to click 'Set Speedo'.
- After clicking this button, you will receive another 'PASS' message on the right-hand side.
- Lastly you will need to click 'Begin Module Replacement', this will begin the final procedure needed for this job.
- You will then be prompted to start the motorcycle and allow it to stall out, five seconds after the bike stalls out press 'OK'.
- You’re going to receive a final 'PASS' message, after receiving the pass message, you have completed the ECU Cloning procedure.
NOTE:
- ACR = Automatic Compression Release
- EITMS = Engine Idle Temperature Management System
- Cruise = Cruise Control
