
- To begin you will need to perform a manual ABS bleed on the bike. After that is completed proceed to step 2.
- Ensure that the IGN is ON, the RUN button is set to RUN, and the VCM is connected.
- Ensure that the battery is at 12v or more and will remain so, for the duration of the module replacement (i.e. Battery Charger).
- In Centurion, click the Active Settings (
 ) button.
 - From there, navigate to ABS Bleeding.

- Click the Accept box for the disclaimer.

- Click the Connect button (
 ), you will now be connected to the bike.
- Select which brake you are going to bleed first (i.e. Front or Rear).
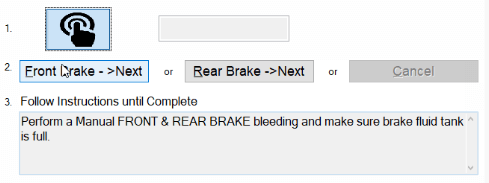
- After selecting front brake, you will receive an instruction set. Read it, then press Front Brake -> Next button (
 )
)
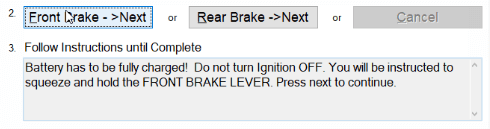
- Your first instruction will be to Squeeze and hold the front brake lever. You will be instructed when to stop in the same window.
During this, you should hear a buzzing noise and have some slight resistance when holding the lever.

- After the window changes, it will ask you a question to make sure that you got the proper response during the procedure.
Confirm the first part of the procedure went accordingly by click the
Front Brake -> Next button ().

- Now you will be instructed to pump the front brake lever. To continue to this step, click the
Front Brake -> Next button ().

- Against as you pump the break lever you will hear that buzzing noise as well as have some slight resistance.

- 14. It will then instruct you to stop pumping the break lever. Go ahead and click the
Front Brake -> Next button ().

- After clicking the Front Brake -> Next button (), you will be prompted with a message that states,
FRONT BRAKE bleeding procedure was completed.
You will also have a 20 second countdown timer when that hits zero then the procedure is fully complete.

- Now that the procedure is complete on the front brake you can now perform the same procedure on the rear brake. It will go through all the same steps.
NOTE: When performing the rear brake bleed, when doing this if you do NOT hear the buzzing noise during the procedure.
This is because there is an issue the rear brake switch, essentially what is happening is that the rear brake is not being recognized.
That will need to be resolved before performing the procedure for the rear brake.