Table of Contents
- Introduction
- Main Features
- How To Setup TR4 System
- All TechnoResearch Cables
- Troubleshooting
- Common Jobs
- Updating Centurion License
- Non-Stock ECUs
- Connecting via Bluetooth
- Victory / Indian Diagnostics
- Checking DTCs Manually (HD)
- FAIL message When Performing Blank ECU Programming
- 1. Centurion Setup and Installation
- 1.1 Where to get the Software
- 1.2 Install Centurion
- 1.3 Run Centurion
- 1.4 Insert Security Key into USB Port
- 1.5 Connect USB Cable
- 1.6 Powerup the Centurion
- 1.7 Powerup to Automatically Install Drivers
- 1.8 Update the Centurion Software
- 1.9 Centurion Disclaimer/Language Selection
- 1.10 Confirm COM Port for Communication
- 1.11 Troubleshooting COM Port Issues
- 2. Using the Centurion
- 3. Centurion Toolbar Icon Description
- 4. Centurion – How to Change Units/Colors
- 5. Centurion Super Pro/Audio – Monitor Real-Time Data (Digital Data View)
- 6. Centurion Super Pro/Audio – Monitor Real-Time Data (Strip Chart Display)
- 7. Centurion Super Pro – Harley Davidson Tests and Activations
- 8. Centurion – Specific Functions for Harley-Davidson® Motorcycles
- ECU/ECM
- 8.1 Centurion Super Pro/Audio – Read And Clear DTCS
- 8.2 Centurion Super Pro – Speedometer Calibration
- 8.6 Centurion Super Pro – Air Fuel Value (AFV)
- 8.7 Centurion Super Pro – Idle Adjustment
- 8.8 Centurion Super Pro – Blank ECU Programming
- 8.9 Centurion Super Pro – Blank Ecu Programming (Clone)
- 8.11 Centurion Super Pro – Module Replacement (4-Pin Models)
- 8.12 Centurion Super Pro – Module Replacement (6-Pin Models)
- 8.13 Centurion Super Pro – ECU: (Enable/Disable)
- 8.17 Centurion Super Pro – Fuel Tank Drain
- 8.18 Centurion Super Pro – Compression Test
- TSM-TSSM-HFSM-BCM
- 8.3 Centurion Super Pro – Hands Free Keyfob Programming
- 8.4 Centurion Super Pro – Keyfob Disabling (Hands Free Fob Only)
- 8.5 Centurion Super Pro – Program Personal Identification Number (Pin) / Personal Key Code
- 8.19 Centurion Super Pro – BCM: (Enable/Disable)
- 8.20 Centurion Super Pro – BCM-Lights: (Enable/Disable)
- 8.22 Centurion Super Pro – Unlocking A Security Module
- 8.23 Centurion Super Pro – Security: Push Button Fob Manual Programming
- INFOTAINMENT
- INSTRUMENTATION
- ABS
- TPMS
- ECU/ECM
- 9. Location of Diagnostic Connectors
- Centurion Glossary
8.22 Unlocking A Security Module
Centurion Super Pro
NOTE: If the ECU is locked by another product, you will NOT be able to perform any active settings changes as we will not be able to communicate with the ECU.If your customer does not know the 5 digit PIN to their motorcycle and does not have a keyfob then follow the procedure located HERE.
| Lamp Behavior | Interpretation |
|---|---|
| No flashing | No security/Not armed |
| A flash every 1 second | Failed entry timeout activated, must wait 2-10 minutes before another attempt can be made. |
| A flash every 2.5 seconds | Armed |
| Very fast flashing (multiple times a second) | Enter PIN |
| Solid with IGN OFF | 5-30s until system is armed |
| Solid for more than 4 seconds after IGN ON | There is an active (current) DTC |
- Connect the TechnoResearch VCM to the dataport of the motorcycle and USB to the computer.
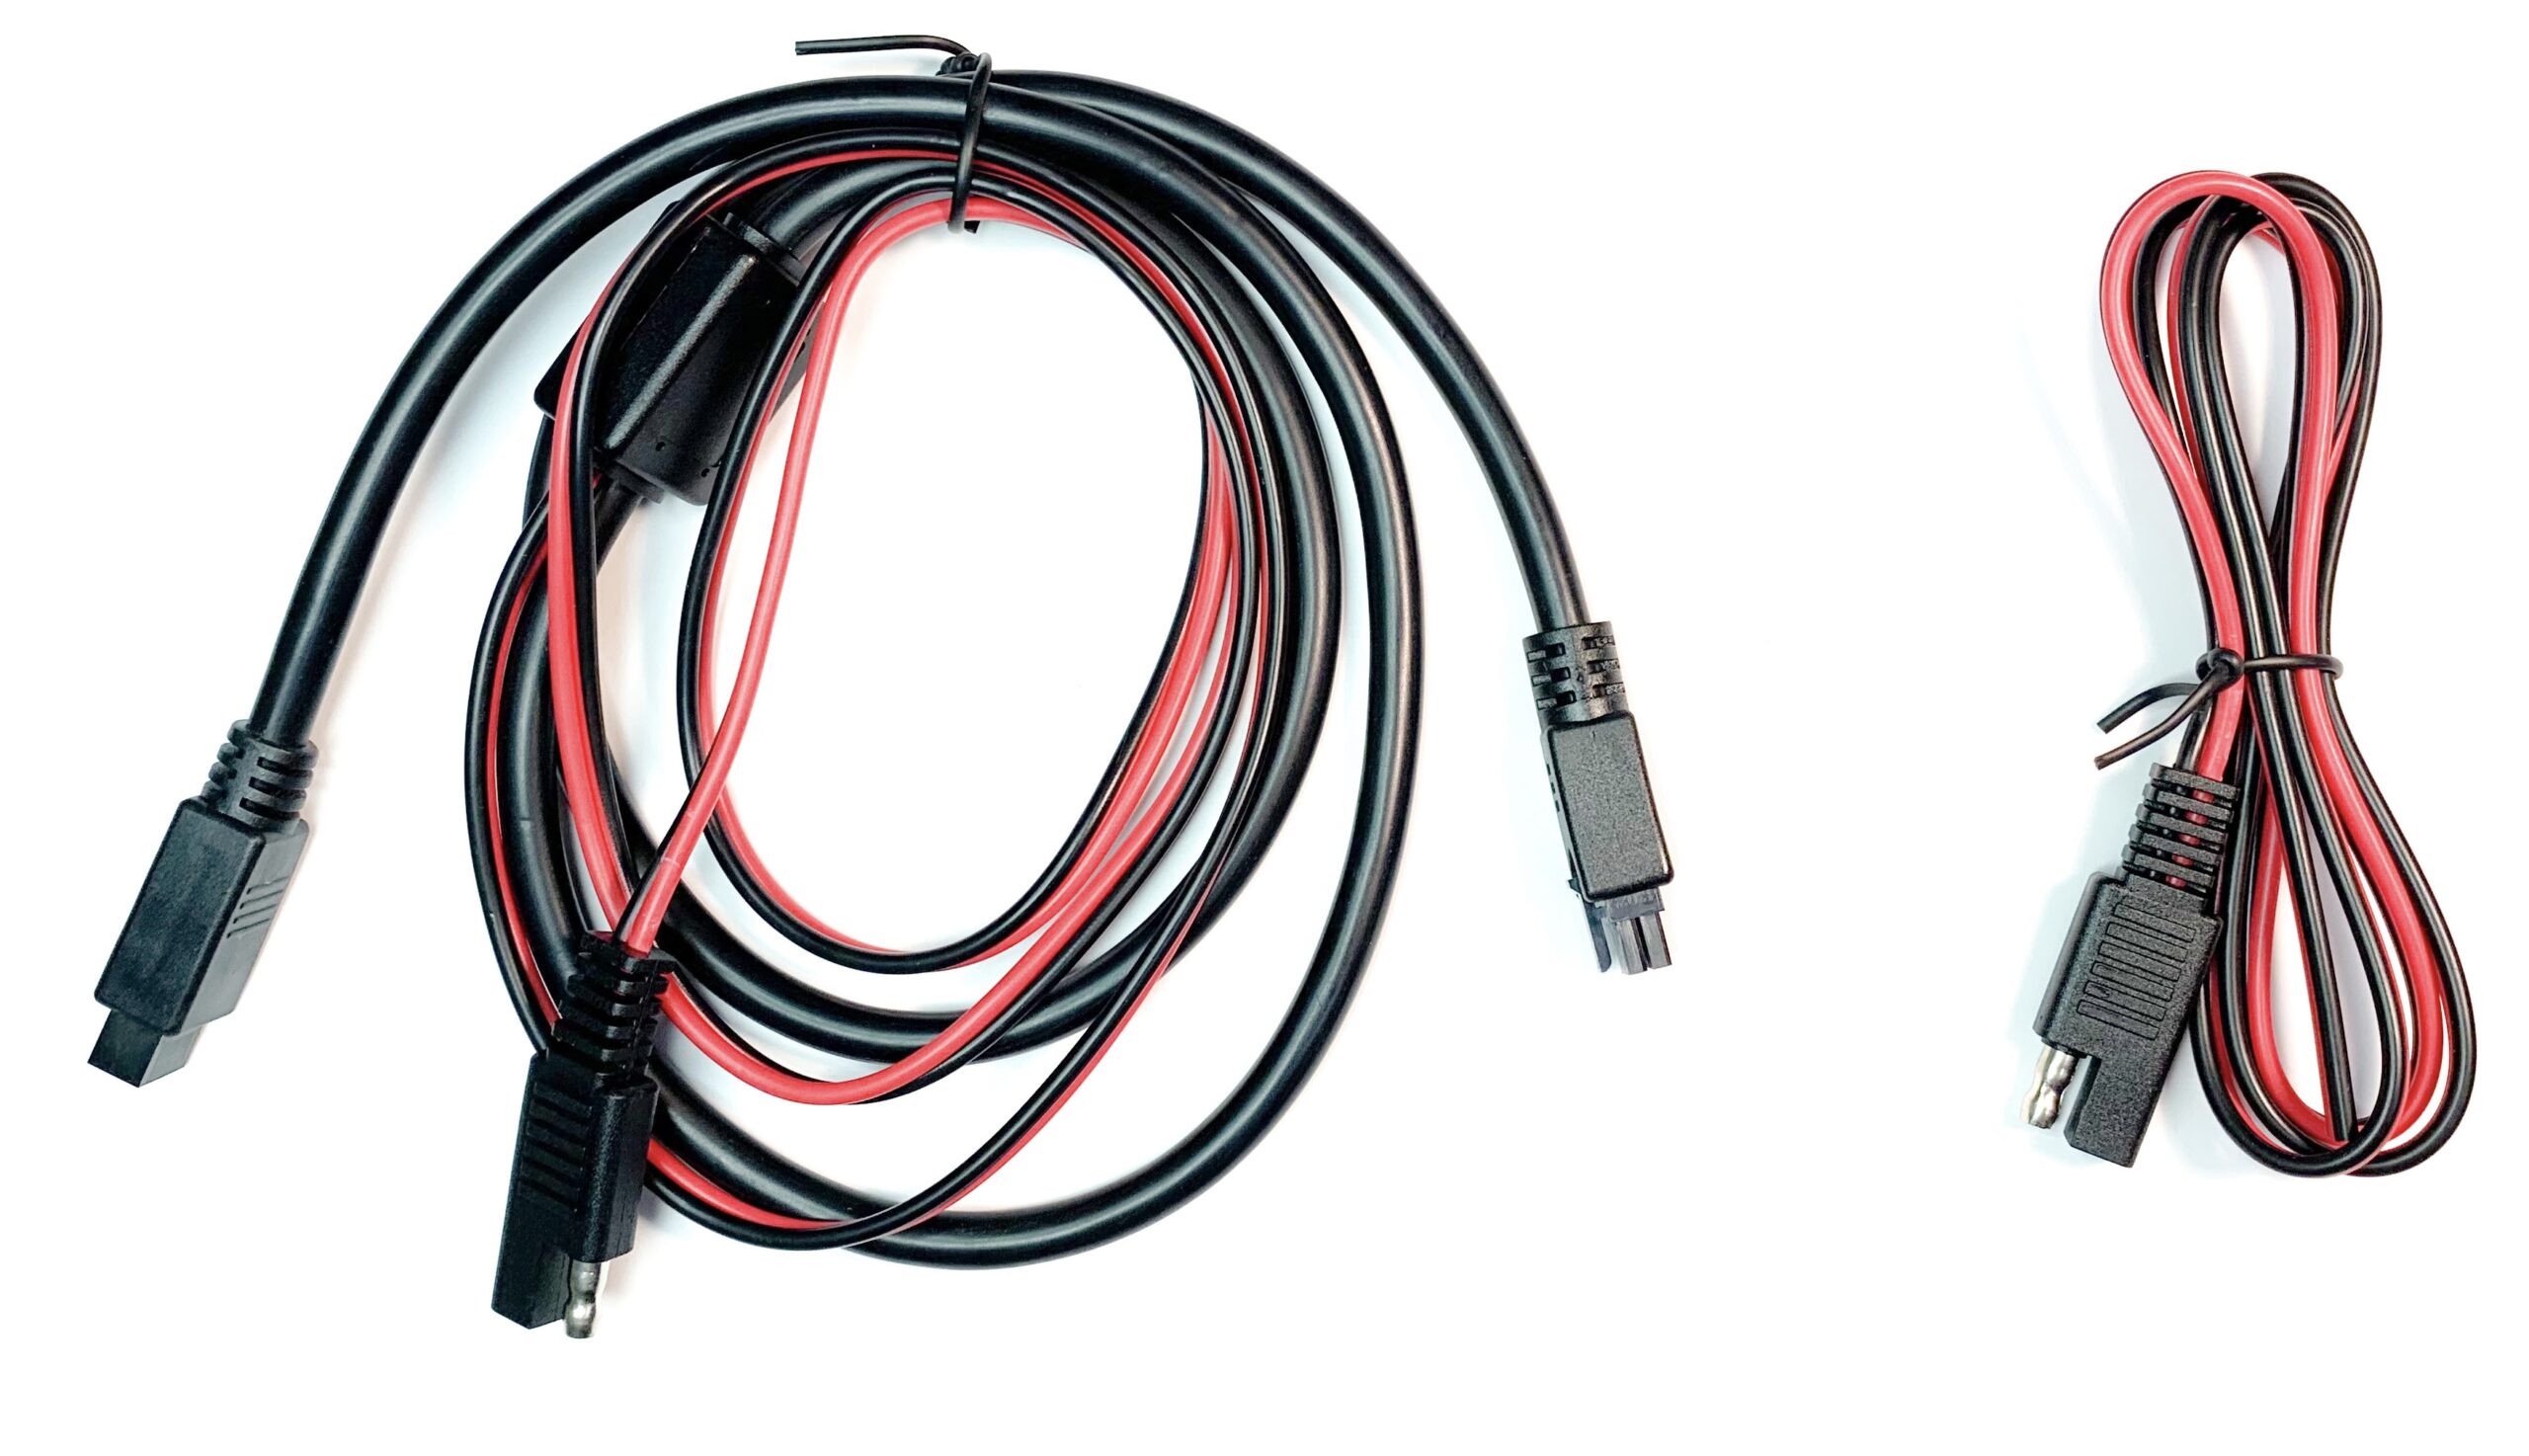
NOTE: If it is a CAN Bus (6 PIN), use the following image as a guide to make connection with motorcycle.

Note that you may have the newer cable that goes between the VCM and the Data Cable.

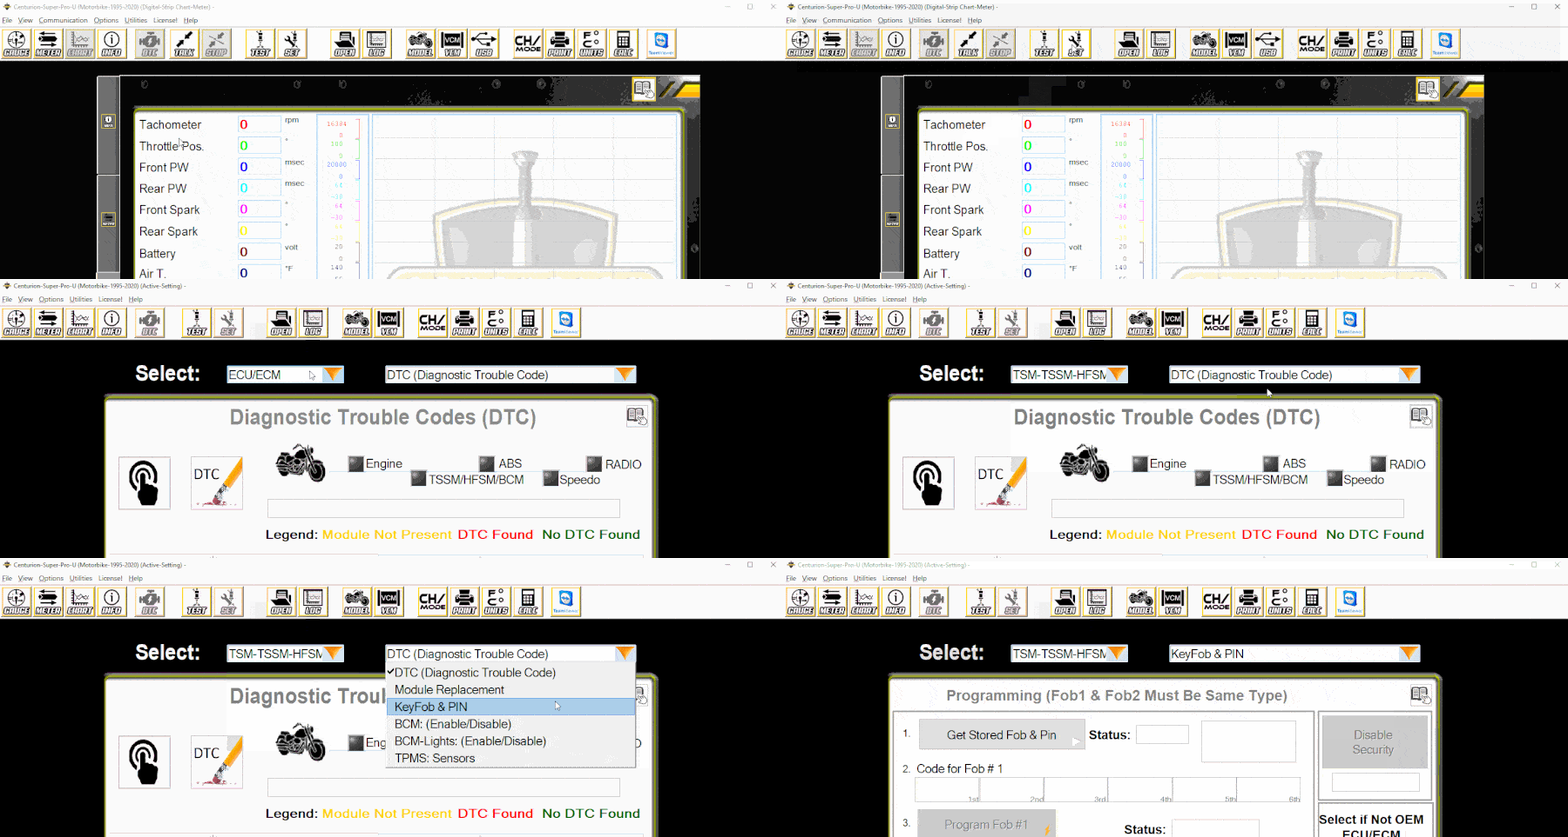
- Select the Active Settings Icon (
 )
) - In the first dropdown menu select 'TSM-TSSM-HFSM-BCM'
- In the second dropdown menu select 'KeyFob & PIN'

- Turn the motorcycle key to ignition and run switch to run
- Press Recover Unkown PIN button.

-
Centurion will then report the 5 digit PIN required to unlock the motorcycle using the turn signals. Once unlocked, the user can then change or disable the existing security settings. Using the recovered PIN, follow these steps:
- Disconnect the VCM-TR3/TR4 from the motorcycle.
- Turn the Key to OFF for ~15 seconds
- Turn the key to IGNITION and immediately hold both turn signal switches until 5 dashes appear in the odometer window.
- Enter the first (1) digit of your PIN by pressing the left signal switch until the correct number is displayed.
- Press the right turn signal switch 1 time to confirm and move to the next digit.
- Enter the second (2) digit of your PIN by pressing the left signal switch until the correct number is displayed.
- Press the right turn signal switch 1 timer to confirm and move to the next digit.
- Enter the third (3) digit of your PIN by pressing the left turn signal switch until the correct numberis displayed.
- Press the right turn signal switch 1 time to confirm and move to the next digit.
- Enter the forth (4) digit of your PIN by pressing the left signal switch until the correct number is displayed.
- Press the right turn signal switch 1 time to confirm and move to the next digit.
- Enter the fifth (5) digit of your PIN by pressing the left turn signal switch until the correct number is displayed.
- Press the right turn signal switch 1 time to confirm.
- Press the right turn signal switch 1 time and the security system will be disarmed.
