Table of Contents
- DirectLink Introduction
- DirectLink Main Features
- How To Setup TR4 System
- About This Manual
- Troubleshooting
- TRo2/o2 Sensors/Rivnut Installation
- O2 Sensor Installation Kit Lite
- ECU Tuning Compatibility
- All TechnoResearch Cables
- Tuning Victory® Motorcycle
- Licensing
- 1 Setup and Installation
- 1.1 Where To Get The Software
- 1.2 Install Direct Link Flash Tuner
- 1.3 Run Direct Link Flash Tuner
- 1.4 Connect USB Cable
- 1.5 Power Up The Direct Link Flash Tuner
- 1.6 Power Up To Automatically Install Drivers
- 1.7 Update The Software
- 1.8 Confirm Com Port For Communication
- 1.9 Troubleshooting Com Port Issues
- 2. Toolbar Menu and Icon Descriptions
- 3. Direct Link – Key Features
- 4. Direct Link – Important Tables
- 5. Program the Calibration into the ECU
- 6. How to Save the Modified Calibration
- 7. How to Change Units and Colors
- 8. Monitor Real-Time Data
(Gauges/Meter Display) - 9. Monitor Real-Time Data
(Strip Chart/Meter Display) - 10. Auto-Mapping
- 11. Common Issues and
Possible Solutions - Glossary
11.6.4 How To Perform A Free Air Calibration on TRo2
Q: How do I do the free air calibration procedure on TRO2?
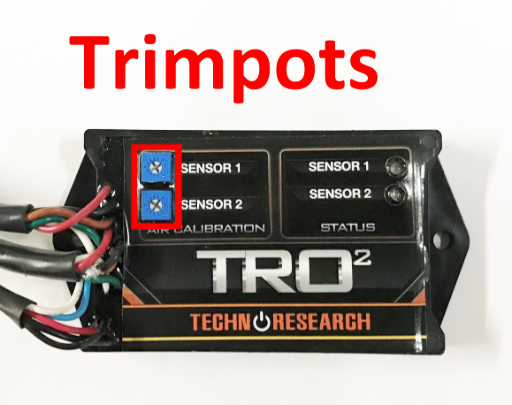
The TRO2 has red status LEDs for each channel. When powered, the LEDs blink at a slow rate until the corresponding sensor has reached normal operating temperature. After installation, the TRO2 requires free air calibration. This should be done with the sensors dangling in free air. The environment must be free of hydrocarbon vapors. It is suggested that the free air calibration be performed outdoors.
To start the calibration:- Turn the free air calibration trim-pots on the TRO2 full counterclockwise.
- Turn on power, typically by turning the motorcycle on, and wait for 60 seconds so the sensors can heat fully.
- Then slowly turn each free air calibration trim-pot clockwise until the corresponding LED starts flashing at a rapid rate. ry to set each trim-pot so that its LED has just started to flash.

