Table of Contents
- DirectLink Introduction
- DirectLink Main Features
- How To Setup TR4 System
- About This Manual
- Troubleshooting
- TRo2/o2 Sensors/Rivnut Installation
- O2 Sensor Installation Kit Lite
- ECU Tuning Compatibility
- All TechnoResearch Cables
- Tuning Victory® Motorcycle
- Licensing
- 1 Setup and Installation
- 1.1 Where To Get The Software
- 1.2 Install Direct Link Flash Tuner
- 1.3 Run Direct Link Flash Tuner
- 1.4 Connect USB Cable
- 1.5 Power Up The Direct Link Flash Tuner
- 1.6 Power Up To Automatically Install Drivers
- 1.7 Update The Software
- 1.8 Confirm Com Port For Communication
- 1.9 Troubleshooting Com Port Issues
- 2. Toolbar Menu and Icon Descriptions
- 3. Direct Link – Key Features
- 4. Direct Link – Important Tables
- 5. Program the Calibration into the ECU
- 6. How to Save the Modified Calibration
- 7. How to Change Units and Colors
- 8. Monitor Real-Time Data
(Gauges/Meter Display) - 9. Monitor Real-Time Data
(Strip Chart/Meter Display) - 10. Auto-Mapping
- 11. Common Issues and
Possible Solutions - Glossary
O2 Sensor Installation Kit Lite (Without Rivet Nut Tool)
INSTALLATION INSTRUCTIONS
NOTE: Click one of the headings to expand and see related information.
1. Remove the heat shield and drill a 9 mm hole in the head pipe.
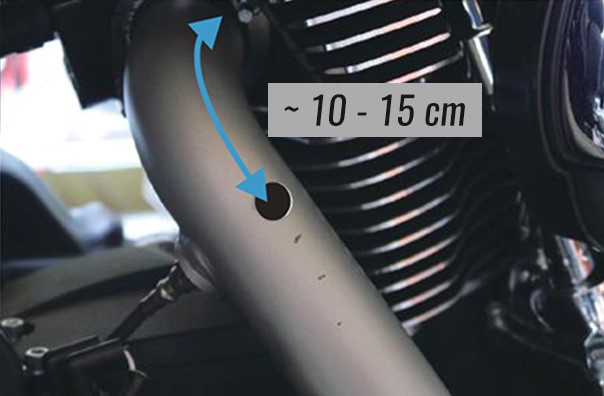
- Remove the heat shield and drill a 9 mm hole in the head pipe.
- Position the hole in a straight portion that is about 10-15 cm away from the exhaust port exit.
Note: Be sure to check the position of the heat shield clamps as you DO NOT want the hole to be over a clamp mark. NOTE: If the hole position is too far from the exhaust port exit, the gases may not be measured accurately.
2. Set the rivnut on the groove side of the nut of the Rivet Tool.
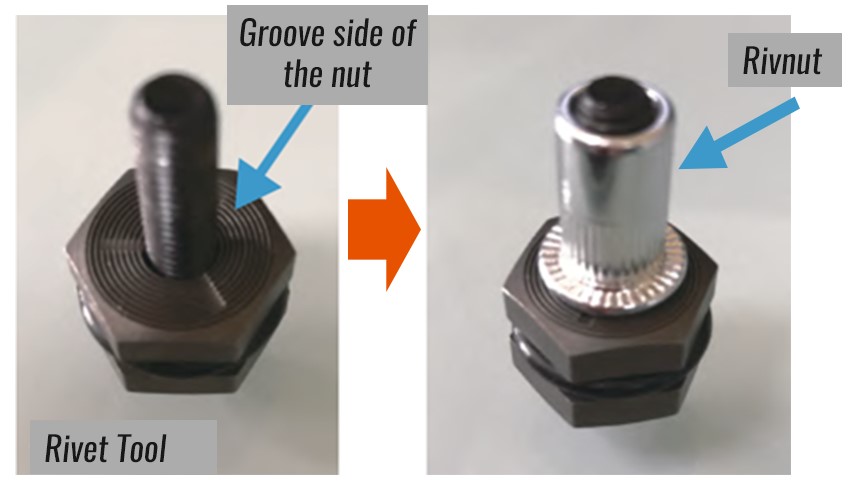
NOTE: If the hole position is too far from the exhaust port exit, the gases may not be measured accurately.
3. Secure the nut with a 17 mm wrench and use a 5 mm hex wrench to tighten the rivnut.

Secure the nut with a 17 mm wrench and use a 5 mm hex wrench to tighten the rivnut.
Note): DO NOT excessively tighten the rivnut as that could lead to damaging or striping the rivnut threads. If this occurs, remove and replace the rivnut with a new one.
4. Fix the O2 sampler block to the head pipe using the supplied copper seal washer and the vented hexagon socket head bolt.
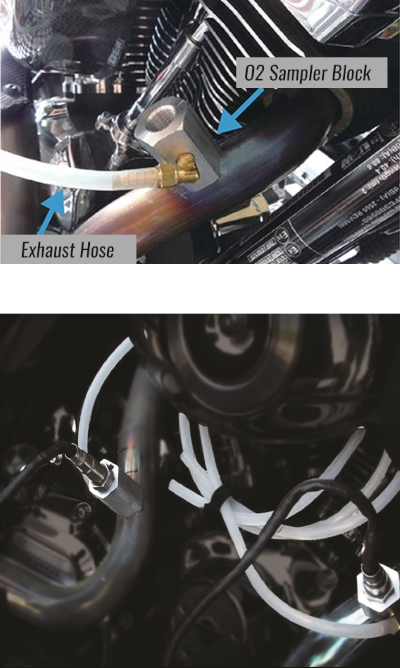
- Fix the O2 sampler block to the head pipe using the supplied copper seal washer and the vented hexagon socket head bolt.
- Attach the silicone hose to the exhaust port jet on the O2 block. Please fix the silicone hose to allow the gases to flow using tape (or other means) to the frame (or other parts) so the hose does not get in the way while running.
NOTE: Make sure there is a copper seal washer between the rivnut and the O2 block as well as a copper seal washer between the head of the bolt and the O2 block to ensure that there will be no leakage of the gases. NOTE: If the vented hexagon socket head bolt is excessively tightened, the bolt may break. NOTE: If the rivnut moves, please retighten the rivnut. NOTE: Be sure to fix the silicone hose so it will not be damaged and is free from creases.
5. Secure the O2 block with a wrench (or by other means) and install the O2 sensor.
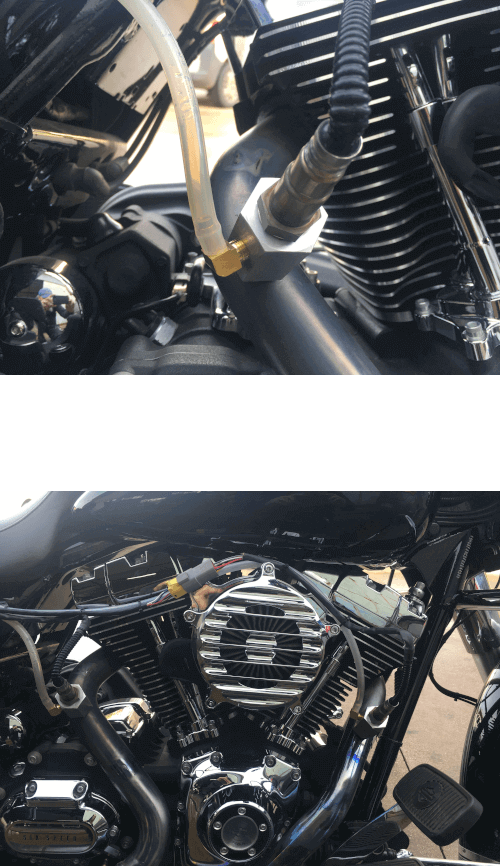
Secure the O2 block with a wrench (or by other means) and install the O2 sensor.
NOTE: If the O2 sensor is tightened without securing the block with a wrench (or by other means), there is a possibility of breaking the vented hexagon bolt.
NOTE: To complete the job, remove the O2 blocks from the motorcycle, insert the seal screws into the rivnuts to eliminate any gas leakage that would occur and then reattach the heat shield to the head pipes.
6. After tuning is complete, remove Wideband sensor and adapter block.
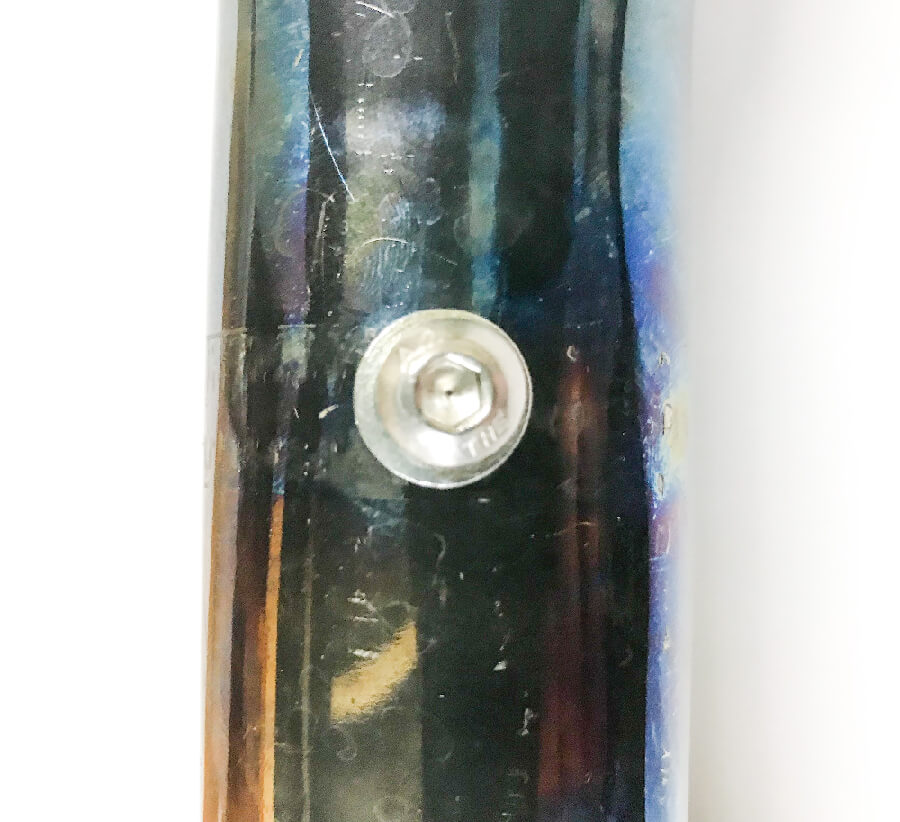
- After tuning is complete, remove Wideband sensor and adapter block.
- Install stainless steel button head screw and a small amount of anti seize.
